MacKarl's MacHelp
Karl Bastian's Mac Tips and Tricks. See his main blog at www.kidologist.com
Saturday, February 03, 2007
Capture Anything On Your Screen
Yet another awesome feature that comes on every Mac. You want a clean image of something
you see on your screen. Maybe it is a photo you can't download, an image you made, or perhaps just part of an image? Want to add an arrow or circle? Turn a PowerPoint slide into an image with ease. (no export as JPG and edit/resize/reduce).
OPTION 1:
Well, on a PC you can take a ScreenShot (some PCs that is), you can as well on a Mac. The command is Apple-Shift-3 and if you have your volume up you will hear a camera shutter telling you there is now a PNG file on your desktop named "Picture 1" and it will continue to number them if you make several. Open by double-clicking, and unless you changed your default opener, Preview will open the file. Select the area you want and hit Apple-K (you know i like that!) and it will crop. Hit Apple-S and it will save cutting out whatever was outside your crop.
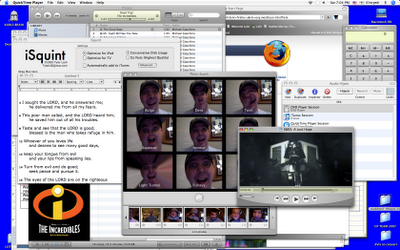
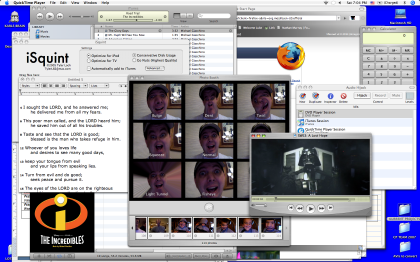
but suppose you only want a SMALL PART of this entire screen shot, say one of the funny pictures of me in the PhotoBooth Program?

OPTION 2: (what makes a Mac a Mac!)
Instead of taking the whole screen and cropping, you can also simply hit Apple-Shift-4 and look at your cursor! It is now a cross hair! Simply drag over what you want and release, now your perfectly cropped image is on the desktop as a PNG. You can resave to a different format, but PNGs are nice, the are crisp and clean and relatively small in file size.
SAMPLE:
To make my CP Team Map (from Kidology.org) I simply create the image in PowerPoint (which I use oten as a graphic layout program, not just presentations, since it is the most flexible program I've ever seen for laying out pictures, text, shapes, etc.) And then I make the window to the size I want and Apple-Shift-4 my image:
 On this blog post, I wanted to point out this climber by showing just the zoomed in part of the image. So I put the full image in PowerPoint, then zoomed in closer in iPhoto, did an Apple-Shift-4 capture (not worth the time of duplicating, editing, exporting, etc. for a one time use image) and dropped the "Picture 1" into PowerPoint, added the circle and arrow (PowerPoint shapes), and then Apple-Shift-4 again for the final image. Takes literally seconds to create an image that would not be worth the time to do it the usual way. (the PC way)
 Have fun! You will discover all kinds of fun applications for this yet-another-built in feature of the Mac!
2 Comments so far
you see on your screen. Maybe it is a photo you can't download, an image you made, or perhaps just part of an image? Want to add an arrow or circle? Turn a PowerPoint slide into an image with ease. (no export as JPG and edit/resize/reduce).
OPTION 1:
Well, on a PC you can take a ScreenShot (some PCs that is), you can as well on a Mac. The command is Apple-Shift-3 and if you have your volume up you will hear a camera shutter telling you there is now a PNG file on your desktop named "Picture 1" and it will continue to number them if you make several. Open by double-clicking, and unless you changed your default opener, Preview will open the file. Select the area you want and hit Apple-K (you know i like that!) and it will crop. Hit Apple-S and it will save cutting out whatever was outside your crop.
but suppose you only want a SMALL PART of this entire screen shot, say one of the funny pictures of me in the PhotoBooth Program?

OPTION 2: (what makes a Mac a Mac!)
Instead of taking the whole screen and cropping, you can also simply hit Apple-Shift-4 and look at your cursor! It is now a cross hair! Simply drag over what you want and release, now your perfectly cropped image is on the desktop as a PNG. You can resave to a different format, but PNGs are nice, the are crisp and clean and relatively small in file size.
SAMPLE:
To make my CP Team Map (from Kidology.org) I simply create the image in PowerPoint (which I use oten as a graphic layout program, not just presentations, since it is the most flexible program I've ever seen for laying out pictures, text, shapes, etc.) And then I make the window to the size I want and Apple-Shift-4 my image:
 On this blog post, I wanted to point out this climber by showing just the zoomed in part of the image. So I put the full image in PowerPoint, then zoomed in closer in iPhoto, did an Apple-Shift-4 capture (not worth the time of duplicating, editing, exporting, etc. for a one time use image) and dropped the "Picture 1" into PowerPoint, added the circle and arrow (PowerPoint shapes), and then Apple-Shift-4 again for the final image. Takes literally seconds to create an image that would not be worth the time to do it the usual way. (the PC way)Have fun! You will discover all kinds of fun applications for this yet-another-built in feature of the Mac!
2 Comments so far
2 Comments:
Karl,
I just want to take this time to pipe in and let you know that I am really glad and enjoying your post on this site again.
Thanks and I look forward to reading more.
By Todd McKeever, at Sunday, 04 February, 2007
Thanx for the tips! I still have so much to learn on my MACS!! Every loittle tip helps and this is a keeper!
By Dave, at Thursday, 22 February, 2007
Archives
![]()
Copyright Karl Bastian 2005